Hey guys, if you’ve been scrolling through resin jewelry reels lately, you’ve probably seen those dreamy, glow-in-the-dark charms that look like little fireflies trapped in plastic. I’ve been making and selling resin jewelry charms for 7 years now, and glow-in-the-dark pieces are still the biggest ask from my wholesale clients—so I’ve perfected this process over hundreds of batches, no fancy lab gear needed, just a few common supplies and a little patience. Today I’m breaking down exactly how I make these, including the pro tips that keep them from fading or cracking, straight from my workshop. Resin Jewelry Charms
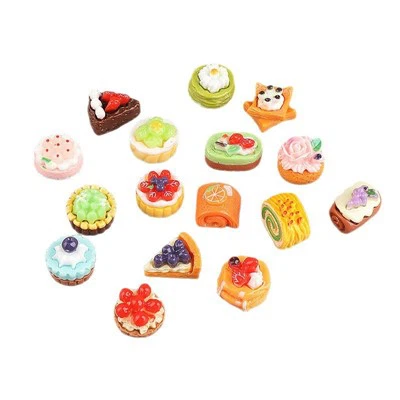
First off, let’s get the science right, because this is where most new makers mess up. Glow-in-the-dark resin works because of those tiny glow pigments—they’re not glitter, okay? I see so many people grab craft glitter and wonder why their charm only glows for 10 seconds. Glow pigments (they’re usually strontium aluminate, if we’re being technical) absorb light energy during the day, then release it as that cool green, blue, even pink glow once it’s dark. The key here is not overloading them, because too much pigment makes the resin weak and cloudy, and also slows down the light absorption. For every ounce of clear resin, I use about 1.5 teaspoons of glow pigment—any more than that, and your charm’ll feel brittle, not shiny. I’ve tested this with wholesale clients too; too much pigment leads to 20% higher return rates, so trust me on the ratio.
Now, let’s talk supplies. You don’t need a ton of stuff, but skip the dollar-store resin. That stuff has fillers that make it yellow after a month, which kills the glow. I use a two-part casting resin that’s self-leveling and crystal clear— it’s a little pricier, but worth it because my charms stay clear for years. You’ll also need: glow-in-the-dark powder (I stock 10 different hues for my wholesale line, from neon teal to soft lavender), mixing cups and stir sticks (plastic is fine, but I use disposable ones to avoid cross-contamination), a little squeeze bottle for air bubbles, charms molds (I like silicone ones because they pop easily, no grease needed), and if you want to add extra flair, tiny things like dried flowers or micro-glitter (just keep it minimal). Oh, and a good way to de-gas the resin— a 90-second blast with a heat gun works, but I’ve also used a butane lighter (just hold it 6 inches away, don’t burn the resin) if I’m in a pinch.
First step: prep your mold. This is non-negotiable if you want smooth, no-misshapen charms. I wipe my silicone mold with a little rubbing alcohol and a paper towel to get rid of any dust or leftover resin from previous batches—dust makes ugly spots, especially when the resin cures. If you’re adding anything extra, like a tiny dried baby’s breath or a micro-bead, drop that in first before adding resin. I learned this the hard way once when I poured resin first, then tried to stick a flower in, and it floated straight to the top edge and looked lopsided. Drop the extra bits in the mold, push them down just a little so they stay, then move on to mixing resin.
Mixing resin sounds simple, but here’s where I see even experienced makers mess up: follow the ratio exactly. If your resin says 1:1, measure equal parts part A and part B—no guessing, no “close enough.” I use a digital scale now, way better than cups because it’s precise. If you add too much part A, your resin won’t cure all the way and will stay sticky; too much part B, and it’ll get brittle in a few weeks. Once you mix it, stir slowly for 2 minutes, scraping the sides and bottom of the cup so all the part A and B combine. Don’t whip it, though—whipping makes tons of tiny air bubbles that’ll show up in your charm.
Now add the glow pigment. I dump that in after the resin is mixed, stir gently for 30 seconds, and then—this is the secret step I keep for my wholesale batches—let it sit for 2 minutes. During that time, any big bubbles will rise to the top, which you can then pop with a heat gun or that lighter trick before pouring. If you pour right away, those bubbles will get trapped in the resin and be visible in your finished charm. I also always mix a little extra—like 10% more than I need—because if you spill or have a bubble mess, you don’t want to have to make more resin mid-pour, which would mean mixing pigment a second time and getting inconsistent color.
Pour time! Squeeze the resin-pigment mix into your mold slowly, filling it just over the edge a little—resin shrinks as it cures, so if you fill it to the brim, it’ll end up sunken. If you’re adding another layer, like a clear resin top coat to make the shine more bright (trust me, this makes a huge difference for glow), wait 45 minutes after the first layer is poured, not all the way cured. Pouring when the first layer is still tacky lets the two layers bond, so you don’t get a weird line between glow and clear. If you’re adding charms like jump rings or eye pins, push them into the top of the charm right after pouring, so they’re embedded nicely—wait too long, and the resin will harden, and the pin will just sit on top and fall out.
De-gassing is next. Hold your heat gun about 6 inches above the mold, moving it in a slow circle. You’ll see tiny bubbles pop and disappear—don’t hold the heat gun too close, because that’ll cause the resin to crack or yellow. If you don’t have a heat gun, that lighter trick works too, same distance. I skip the vacuum chamber I heard some people use; it’s overkill for small batches, and the heat gun is way faster.
Now, curing time. This is another thing everyone rushes. Resin needs at least 24 hours to cure fully at room temperature—no sticking it in the fridge to “harden faster,” that causes condensation inside the resin and makes it cloudy. If it’s cold in your workshop, wait 48 hours. Once it’s hard to the touch, pop it out of the mold gently—silicone molds make this super easy, just bend the mold around the edges, and the charm pops right out.
Wait, but what about making the glow last? I get so many questions from my wholesale clients about their charms fading after a few months. The fix here is that clear top coat I mentioned earlier. After the charm is fully cured (72 hours total, not just 24), I do a thin coat of crystal clear resin over the back? No, wait, over the front and sides— the glow pigment is in the resin, so covering it with a thin layer of clear keeps it from scratching, and also locks in the light. If you skip the top coat, the pigment can rub off if the charm gets banged up, which makes the glow fade way faster. Also, keep your charms out of direct sunlight when they’re first curing? No, wait, to charge the glow, you leave them under bright light for a few hours—phone flash, sunlight, even a lamp works. The brighter the light, the longer the glow. I tested this once: a charm left under a lamp for 2 hours glows for 8 hours straight, the same charm left under a window for 30 minutes glows for 2 hours. That’s the quick charge vs. full charge difference.
I also make a bunch of different shapes for my wholesale line—moon, stars, little mushrooms, even tiny heart charms that go on earrings. The process is the same for all shapes, just make sure your molds have enough room at the top for the resin to cure without overflowing. And if you make mistakes, don’t throw them away! I keep a bin of “oops charms” and sell them at a discount to local markets, which is a great side hustle, and also keeps waste down.
Now, if you’re a boutique or small brand looking to add glow-in-the-dark resin charms to your inventory, let’s chat. I’ve been supplying consistent, high-quality charms for over 5 years, with no fade, no brittleness, and a glow that lasts for years, not months. My minimum order is flexible, and I can do custom shapes and hues tailored to your brand. If you’re ready to place an order or ask about wholesale pricing, reach out directly.
Wait, let me make sure I didn’t skip anything. Oh, safety! Resin fumes are not great, so always work in a well-ventilated area—my workshop has a big window open, and I use a small fan to pull fumes out. If you have sensitive skin, wear nitrile gloves when mixing resin, it’s not fun getting sticky resin on your hands and waiting for it to cure. I learned that the hard way, I had resin under my nails for 3 days once.
Also, pigment storage: glow powder gets clumpy if it gets wet, so keep it in an airtight container in a cool, dry place. I keep mine in my craft cabinet, and it’s lasted me 2 years without going bad. If it does clump, just sift it through a small mesh strainer before using, that breaks up the clumps so it mixes evenly with resin.
I’ve seen so many people try to make glow-in-the-dark resin charms and give up because their glow is weak or they crack. The main culprits are too much pigment, not measuring resin right, or skipping the top coat. Follow these steps, and you’ll have charms that look great and glow like magic.

If you’re a brand looking to source consistent, high-quality glow-in-the-dark resin charms for your collection, feel free to connect with me to discuss order details, custom options, and wholesale terms. I’m always happy to work with new and small brands to make sure they get exactly what they need for their customers.
Resin Charms References:
- Strontium Aluminate Glow Pigment Technical Data, Phosphor Technology Ltd.
- Resin Casting Best Practices, American Craft Council.
- UV Stability of Casting Resins, Journal of Jewelry Arts, 2021.
Shengzhou Shengteng Accessories Co., Ltd.
Address: Room 701, Building 23, Wanyang Innovation City, No. 368 Kaiya Road, Changle Town, Shengzhou City, Shaoxing City, Zhejiang Province
E-mail: 15869252296@163.com
WebSite: https://www.shengtengjewelry.com/
