Making a DIY stuffed fish can be an extremely rewarding and fun experience. As a supplier of DIY toys, I’ve had the privilege of seeing the joy and creativity that these projects bring to people of all ages. Whether it’s a child learning the basics of sewing or an adult looking for a relaxing weekend activity, a DIY stuffed fish is a great choice. In this blog, I’ll share what I believe is the best way to make a DIY stuffed fish, from choosing materials to the final touches. DIY Toys

Selecting the Right Materials
The first step in creating a DIY stuffed fish is to select the appropriate materials. This is crucial as it will determine not only the look and feel of the finished product but also its durability.
Fabric
- Type of Fabric: For the body of the fish, you’ll want to choose a soft and durable fabric. Cotton is an excellent choice as it’s easy to work with, breathable, and comes in a wide variety of colors and patterns. If you’re going for a more realistic look, you can opt for printed fabrics that mimic the scales of a fish. Fleece is another popular option because of its softness and stretchability, which can give the fish a plump and cuddly appearance.
- Quantity: Depending on the size of the fish you want to make, you’ll need to measure and cut the fabric accordingly. A good rule of thumb is to have at least two pieces of fabric that are large enough to trace your fish pattern on. Make sure to add some extra inches for seams and hems.
Stuffing
- Filling Options: Polyester fiberfill is the most common stuffing material for stuffed toys. It’s lightweight, hypoallergenic, and easy to work with. You can buy it in bulk at most craft stores. If you’re looking for a more eco – friendly option, you can use natural materials like cotton batting or shredded wool. However, these may be more expensive and can be a bit more difficult to shape.
Other Supplies
- Thread and Needles: Choose a thread that matches the color of your fabric. For sewing the body of the fish, a medium – weight thread will work well. You’ll also need a few different sizes of needles. A sharp point needle is ideal for sewing the fabric, while a blunt – tip needle can be used for stuffing the fish.
- Scissors and Pins: A good pair of fabric scissors is essential for cutting the fabric accurately. Pins will help you hold the fabric pieces together while you sew.
- Embroidery Floss and Beads: If you want to add some details like eyes or fins, embroidery floss can be used to stitch on the eyes, and beads can be added for a more decorative effect.
Designing Your Fish
Before you start cutting and sewing, it’s important to have a clear design in mind for your fish.
Sketching Your Design
- Shape and Size: Decide on the shape and size of your fish. You can draw inspiration from real – life fish species, or create a unique, cartoon – like design. Sketch your design on a piece of paper and make any necessary adjustments.
- Details: Consider adding details such as fins, a tail, and scales. You can draw these on your sketch as well. These details will not only make your fish look more realistic but also add to the fun of the DIY project.
Creating a Pattern
- Transferring the Design: Once you’re happy with your sketch, you can transfer it onto a piece of cardboard or paper. Cut out the pattern carefully, making sure to include any notches or markings that will help you align the fabric pieces when sewing.
- Duplicating the Pattern: You’ll need two copies of the fish pattern for the front and back of the fish. You can either trace the pattern onto a second piece of cardboard or paper, or simply fold the pattern in half and cut out two identical pieces at once.
Cutting and Sewing the Fabric
With your materials and pattern ready, it’s time to start cutting and sewing the fabric.
Cutting the Fabric
- Laying Out the Pattern: Place your fish pattern on the fabric and pin it in place. Make sure to align the pattern with the grain of the fabric for a more even finish.
- Cutting the Pieces: Use your fabric scissors to cut out the fabric pieces along the outline of the pattern. Do this for both the front and back pieces of the fish.
Sewing the Fish
- Preparing the Seams: Place the two fabric pieces right – sides together and pin them along the edges. Leave a small opening at the bottom of the fish for stuffing.
- Sewing the Seams: Starting at the top of the fish, sew along the edges using a straight stitch. Keep your stitches evenly spaced and about 1/4 inch from the edge of the fabric. When you reach the opening for stuffing, backstitch to secure the stitch and then continue sewing until you meet the starting point.
Stuffing the Fish
Stuffing the fish is one of the most satisfying parts of the DIY process.
Preparing the Stuffing
- Fluffing the Fiberfill: If you’re using polyester fiberfill, fluff it up to make it easier to work with. You can do this by shaking the bag vigorously or by using your hands to break up any clumps.
Stuffing the Fish
- Using a Stuffing Tool: You can use a simple tool like a pencil or a chopstick to help you stuff the fish. Start by inserting the stuffing into the head and then work your way down to the body. Make sure to stuff the fish firmly but not too tightly, as this will make it difficult to sew up the opening.
- Shaping the Fish: As you stuff the fish, use your hands to shape it into the desired form. You can add more stuffing to certain areas to make the fish look more realistic, such as the fins and the tail.
Adding Details
The final step is to add some details to your DIY stuffed fish to make it truly unique.
Finishing the Seam
- Closing the Opening: Once the fish is fully stuffed, use a ladder stitch or a hidden stitch to close the opening at the bottom. This will create a seamless finish.
Adding Eyes and Fins
- Sewing on the Eyes: Use embroidery floss to stitch on the eyes. You can create simple round eyes or more complex shapes for a more expressive look.
- Attaching the Fins: Cut out fin shapes from the remaining fabric and sew them onto the sides and back of the fish. You can use a zig – zag stitch or a straight stitch to attach the fins securely.
Adding Scales
- Painting or Sewing Scales: If you want to add scales to your fish, you can use fabric paint to paint them on. Alternatively, you can sew on small pieces of fabric or beads to create a scale – like effect.
Why Choose Our DIY Toys
As a DIY Toys supplier, we offer high – quality materials and supplies that are perfect for making your own stuffed fish. Our fabrics come in a wide range of colors and patterns, allowing you to create a truly unique fish. Our stuffing materials are soft, hypoallergenic, and easy to work with.
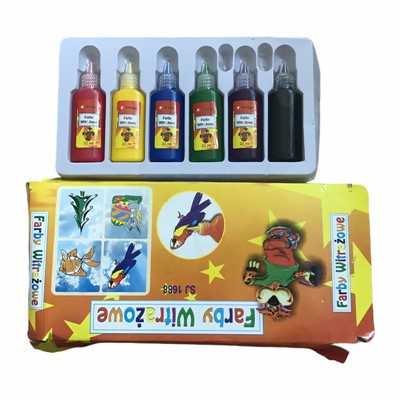
We also provide detailed instructions and patterns for our DIY projects, making it easy for beginners to get started. Whether you’re a schoolteacher looking for a fun art project for your students or an individual who loves to craft, our DIY toys are the perfect choice.
Solid Watercolor Paints If you’re interested in purchasing our DIY toy materials for making stuffed fish or other projects, we’d love to hear from you. Contact us to discuss your采购 needs and start creating your own amazing DIY toys today.
References
- "The Complete Guide to Sewing Toys" by Jane Smith
- "Crafting with Fabric" by Emily Johnson
- Local craft store brochures and advice from experienced crafters
Zhejiang Lanxi Haotian Stationery Co., Ltd.
We are one of the most reliable diy toys manufacturers and suppliers in China, specialized in providing high quality stationery products with low price. We warmly welcome you to buy bulk diy toys for sale here from our factory. Contact us for pricelist.
Address: No. 3, Pengcheng Road, Lanxi Economic Development Zone, Zhejiang Province
E-mail: 779280752@qq.com
WebSite: https://www.cnhtstationery.com/
